Optimizing Your Build using MSBuild

Today's topic isn't really related to leadership, or being a team lead, but I thought that this post may be useful to you, in addition to my future self, as I sometimes tend to forget things. As you may have guessed from the heading, the topic is optimizing MSBuild so that they run faster and take less time. So without further a due, lets get into it.
Multi-core Processing
/m Switch
Pretty much every machine today has more than one core. As you all know, having multiple cores allows tasks to be run in parallel and MSBuild has built in support for this as well.
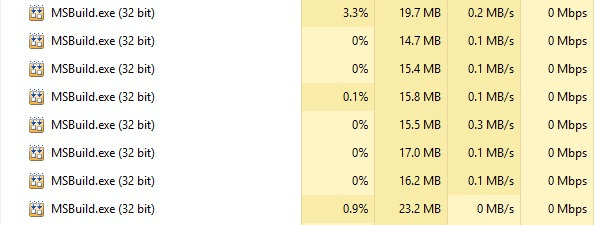
In order to use multiple cores during your build, all you need to pass the /m switch to MSBuild. For example,
MSBuild.exe _project.msbuild /m /p:Platform="Any CPU"
When this switch is used, MSBuild it will actually spawn multiple MSBuild.exe which will each handle part of the build process, thereby decreasing the actual build time.
BuildInParallel Switch
There other switch, which is closely related to the one above, is the BuildInParallel switch. This can only be used in conjunction with the /m switch and it purpose is to build multiple projects in parallel, per MSBuild instance. An example of this is as follows:
MSBuild.exe _project.msbuild /m BuildInParallel="True" /p:Platform="Any CPU"
DetailedSummary Switch
MSBuild has a nice switch which shows a summary of the build process, including the time it took to build the project. You can enable this by using the /detailedsummary switch, as follows:
MSBuild.exe _project.msbuild /m /detailedsummary /t:Build
The output of the switch is as follows:

In the image above, the Id column on the left is the Id of the project being built. You can see that there are vertical lines below the Id's, those represent dependencies. So in order to build project 0, MSBuild needed to build project 1, which in turn needed to build 18,37,38 and so on. The Exclusive Time column, is the amount of time taken to build that particular project and the Total Time column is the time it took to build the project as well as all its dependencies. Lastly, the path is just the location of the project file being built.
As you can see this can give you some guidance into what projects are slow to build, so you can focus on those first.
Hard Linking Files
If you find that your build has a lot of disk I/O as it is copying the output of the projects to all sorts of directories, then you want to use the hard linking capabilities of MSBuild.
Hard linking is simply a way in which a single file can be "referenced" by multiple paths. I like to think of it as an alias to a file. If you enable this feature in MSBuild, the files will not be physically copied, but instead they will reference existing files, thereby skipping the I/O portion and potentially saving you quite a bit of time. Just out of interest, you can measure the disk I/O using ProcMon and filtering the results on msbuild.exe and then creating a File Summary from the Tools menu.
The four types of hard linking that are available in MSBuild are as follows:
- CreateHardLinksForCopyLocalIfPossible
- CreateHardLinksForCopyFilesToOutputDirectoryIfPossible
- CreateHardLinksForCopyAdditionalFilesIfPossible
- CreateHardLinksForPublishFilesIfPossible
An example of how these would be used are as follows:
MSBuild.exe _project.msbuild /p:CreateHardLinksForCopyLocalIfPossible=true; CreateHardLinksForCopyFilesToOutputDirectoryIfPossible=true; CreateHardLinksForCopyAdditionalFilesIfPossible=true; CreateHardLinksForPublishFilesIfPossible=true;^
In our scenario, we went from having around 2GB of disk I/O to about 250MB, so it can make quite a difference.
Miscellaneous Items
We also done a few minor things, such as configuring the solution to not build test projects for release builds. However, we still have those done for our check-in/daily etc builds.
From the detailed summary report that I mentioned above, we saw that some of our post-build tasks were actually taking a significant amount of time as well, so we optimized them.
With all the above changes that we made, we managed to reduce our build time by quite a bit. If you have any other things you found that helped improve your build time, drop them in the comments section below.
Until next time...keep learning!